
For those who have seen my pedalboard in person or have watched my rig run through video and are looking for more information about the MIDI integration, look no further! I hope this helps! If you have any further questions please leave a comment below.
With the One Control OC10 in Program mode (and with each MIDI pedal set to channel 1), I’m able to change the presets on all my MIDI pedals simultaneously with the push of one button on the OC10. Bank 1, PGM 1 on the OC10 sends a “MIDI program change” command to all my MIDI pedals, recalling their first preset. Bank 1, PGM 2 recalls their next preset, and so on.
For the MIDI on this rig I had three goals:
- Be able to control all the MIDI presets on all my MIDI pedals with the OC10. This would be super easy if this was the only goal, but…
- Be able to easily edit/save/organize my Strymon presets with Strymon’s NIXIE software on my computer without having to disconnect my MIDI cables from the back of the pedals every time.
- Be able to have Ableton (or any external MIDI device) trigger my programs for a truly “foot free” experience if I wanted to.
NIXIE
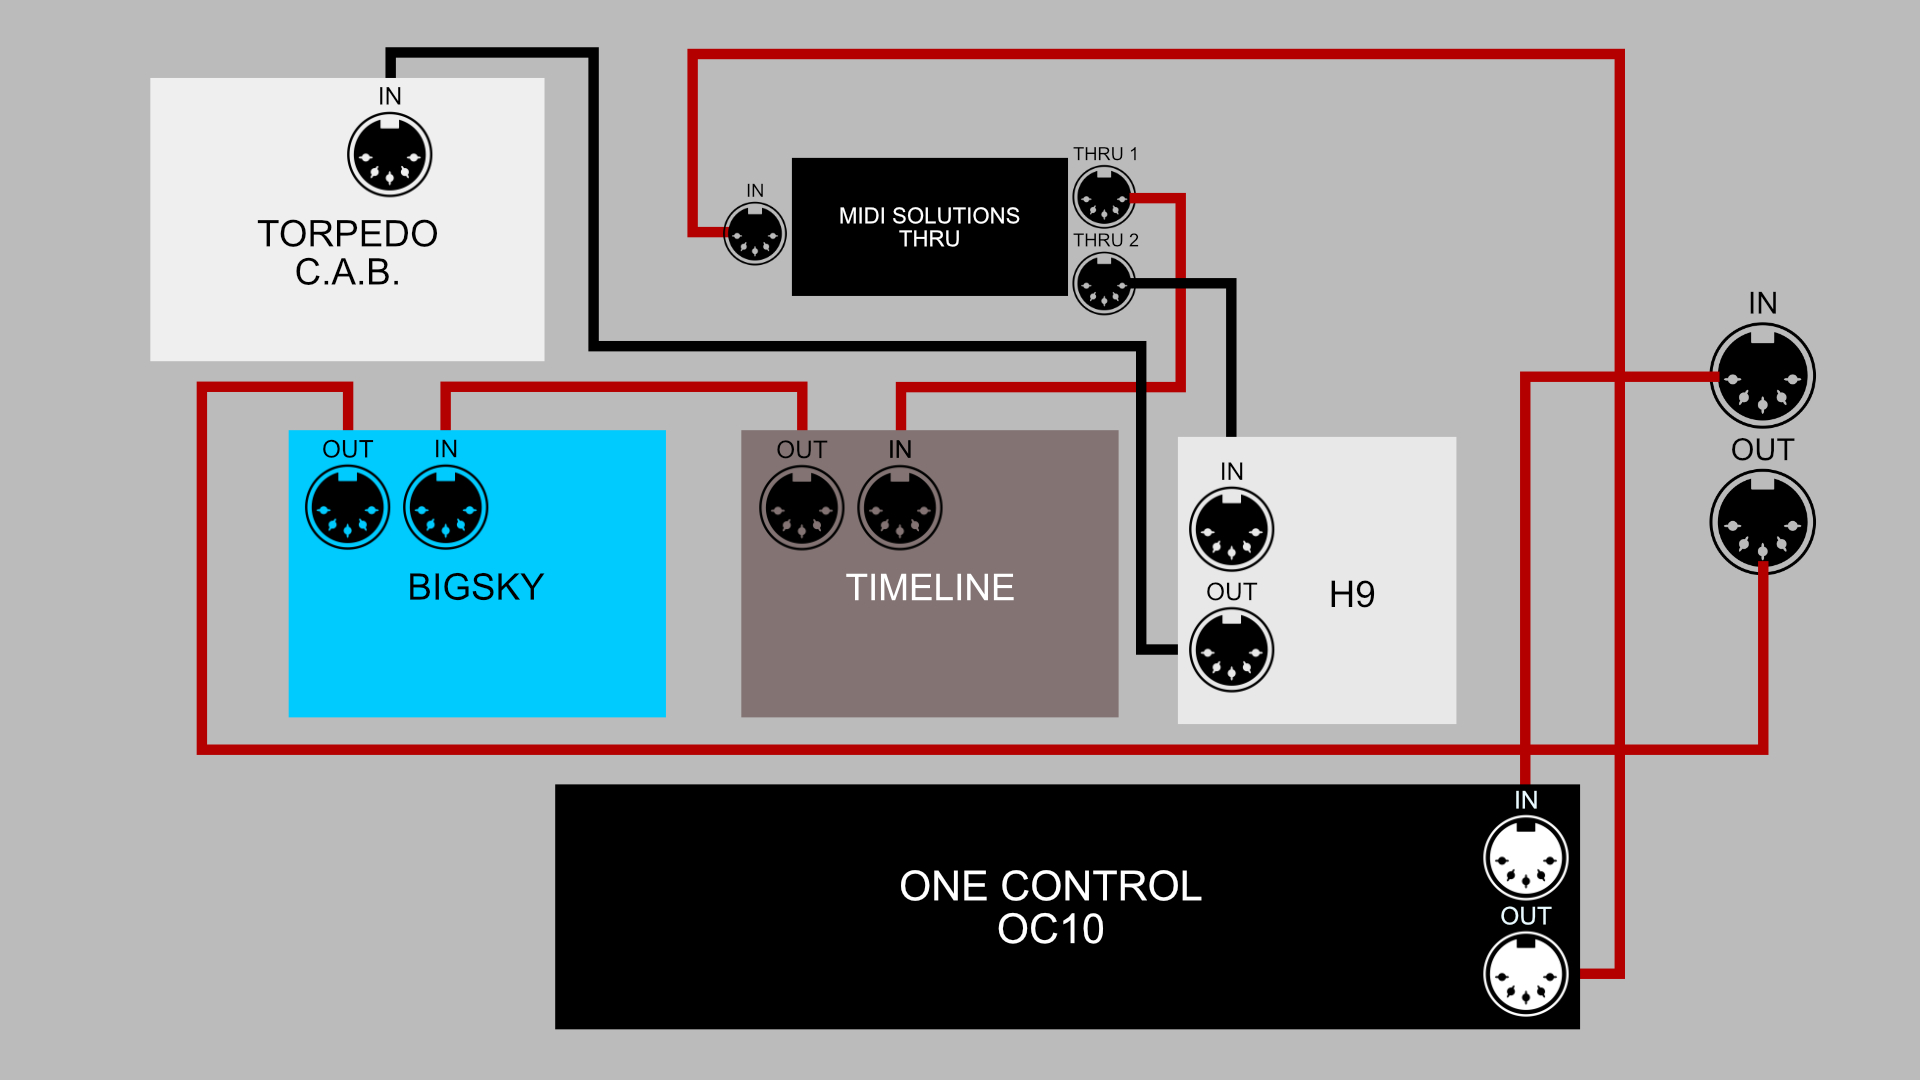
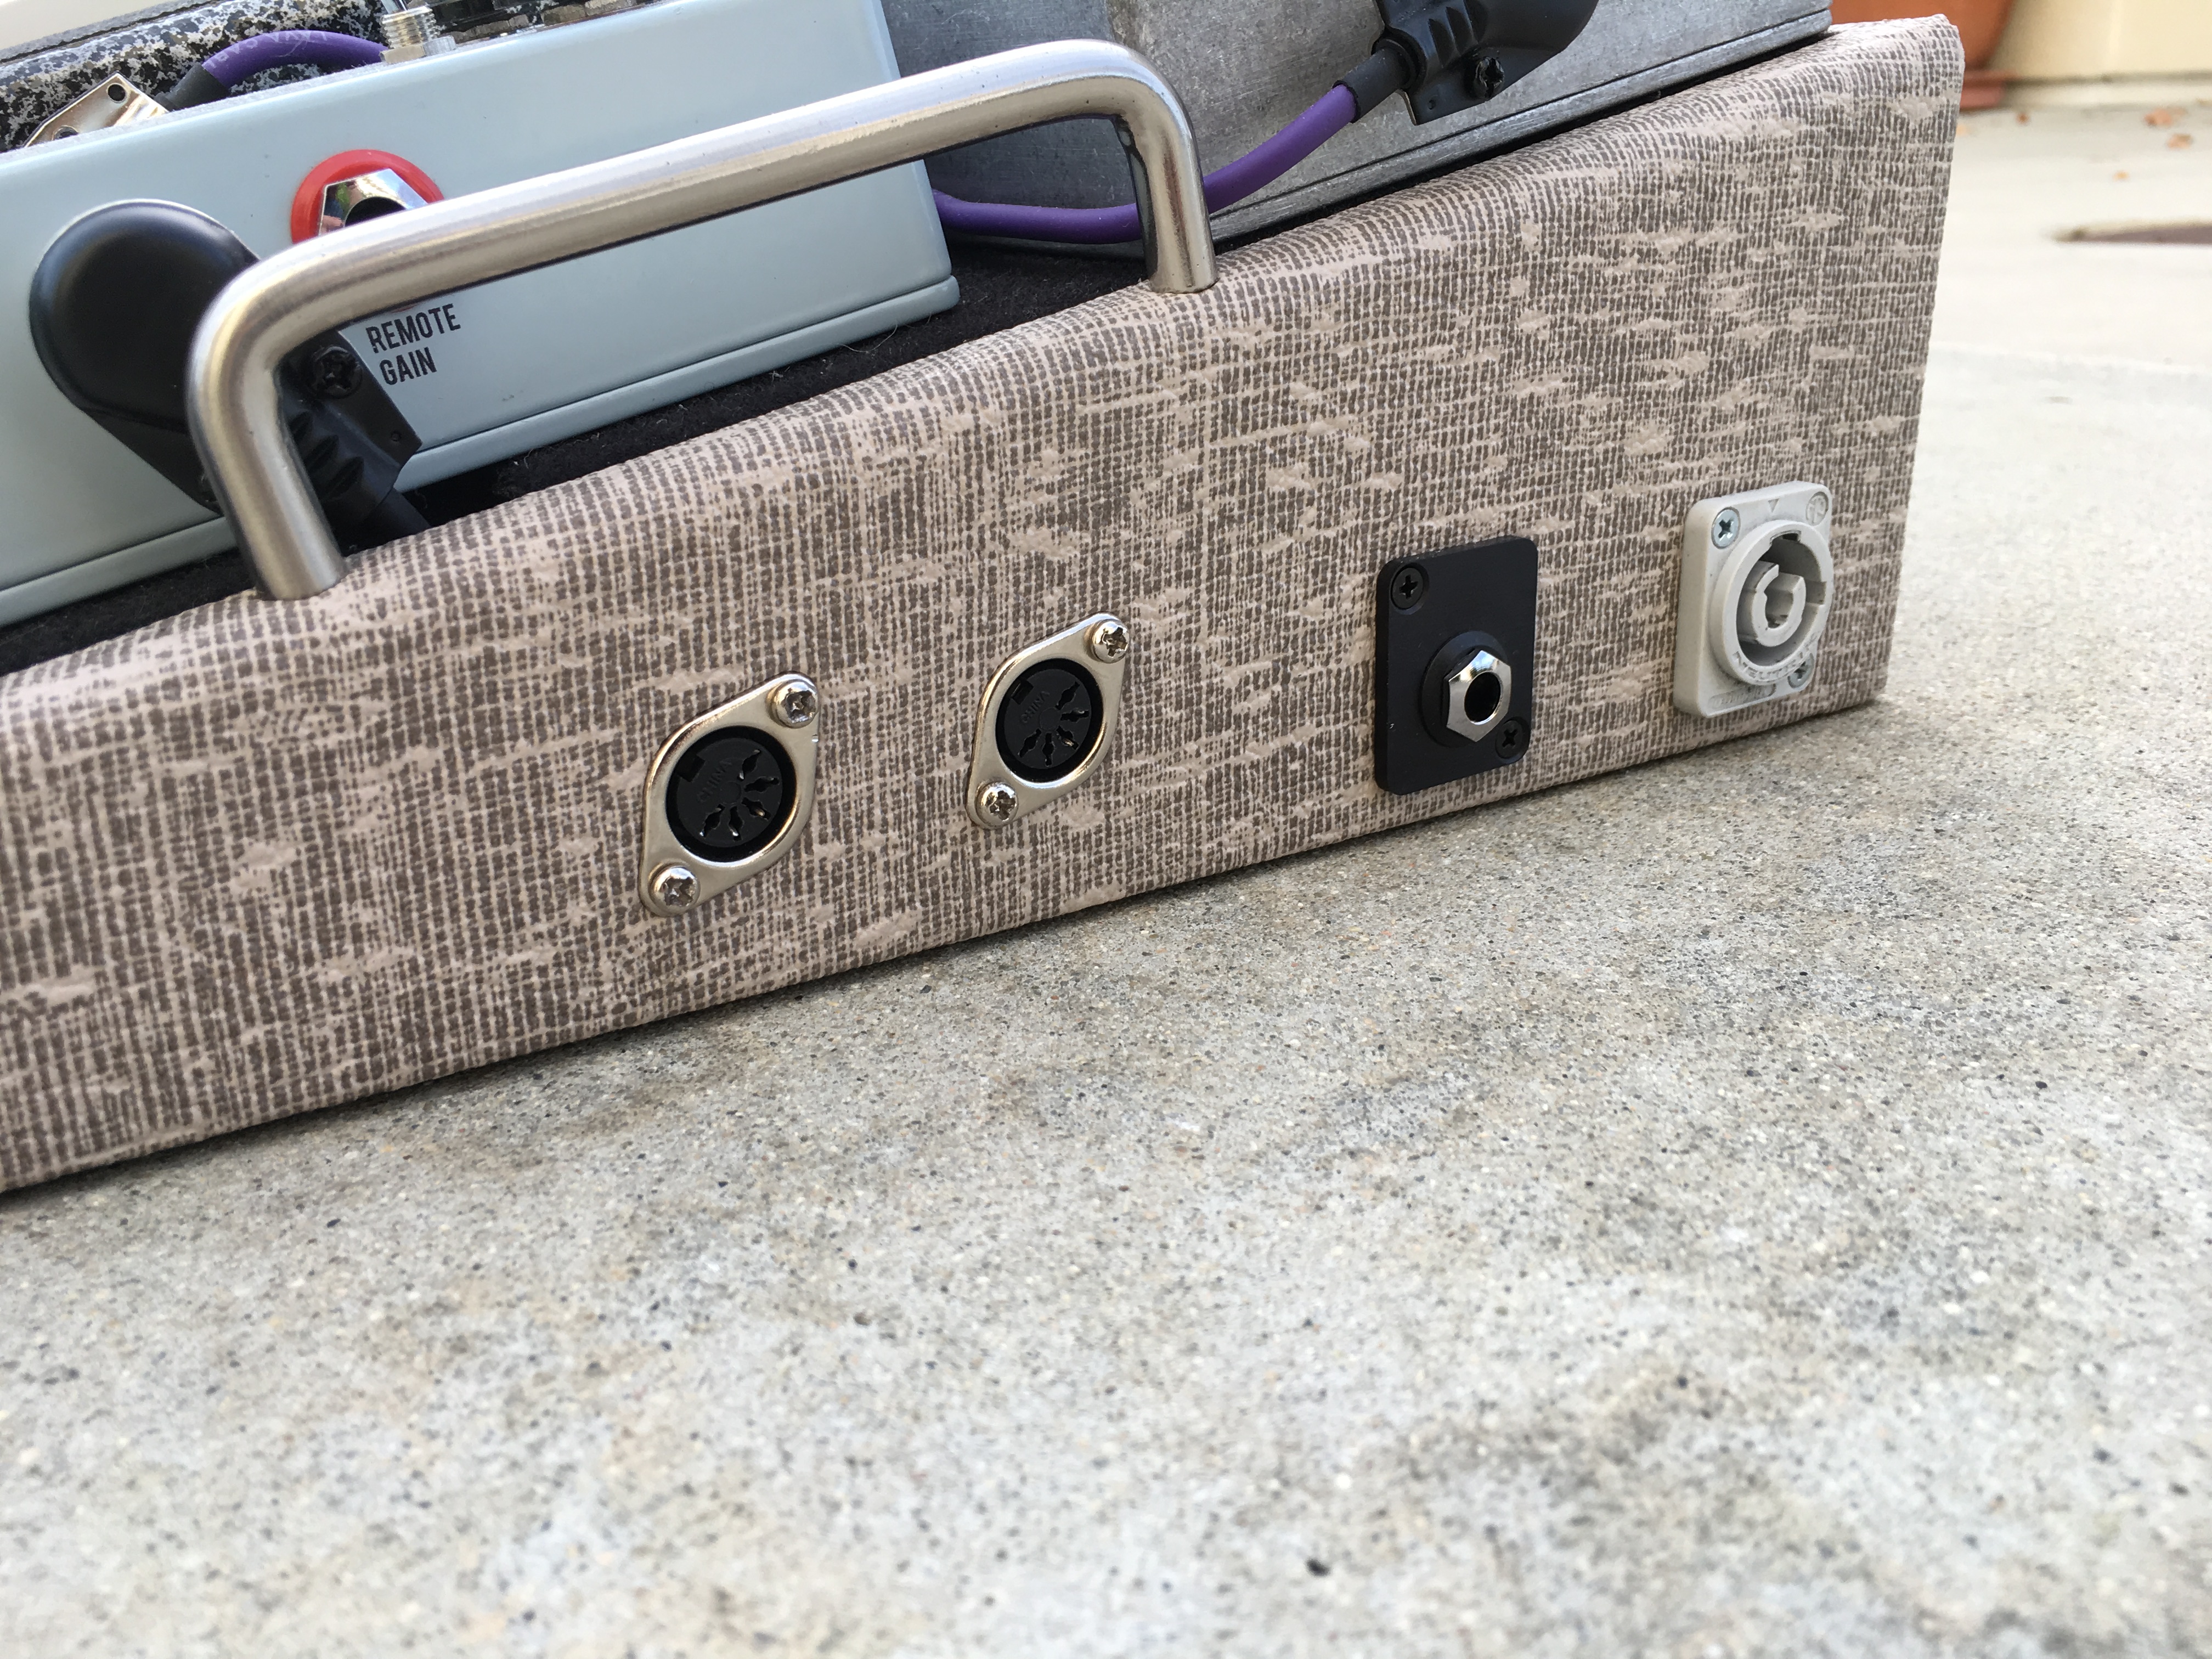
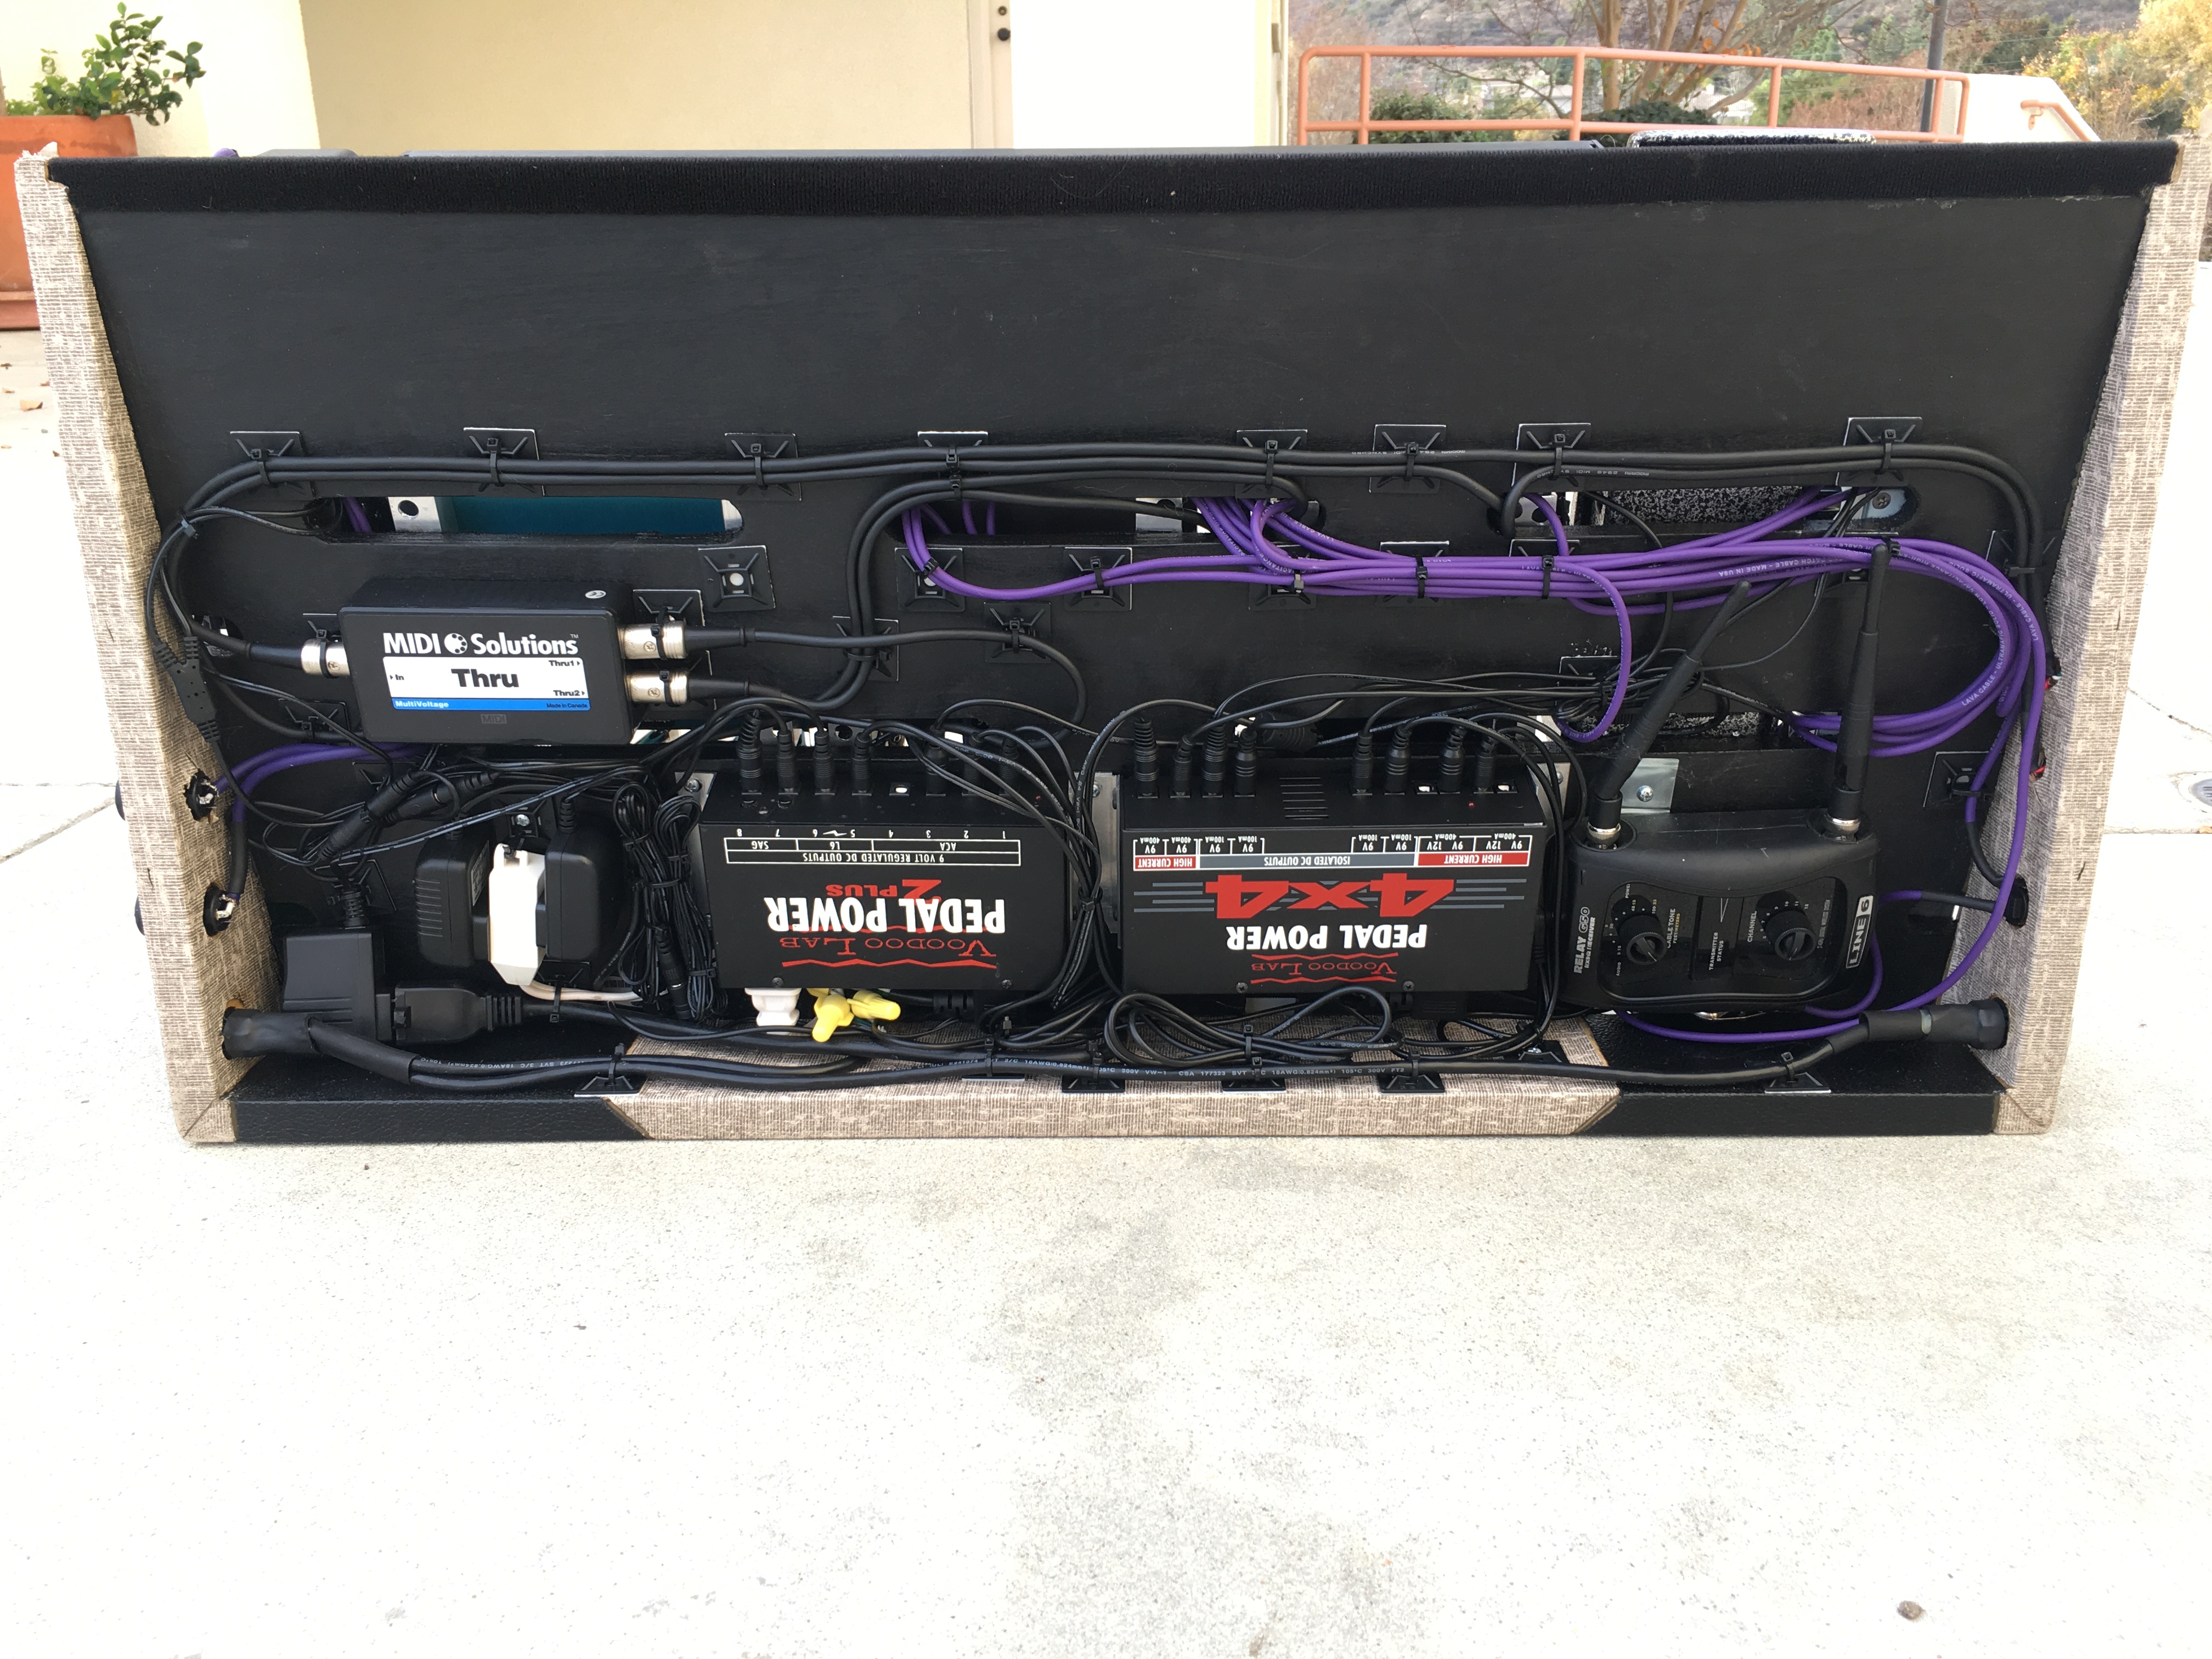
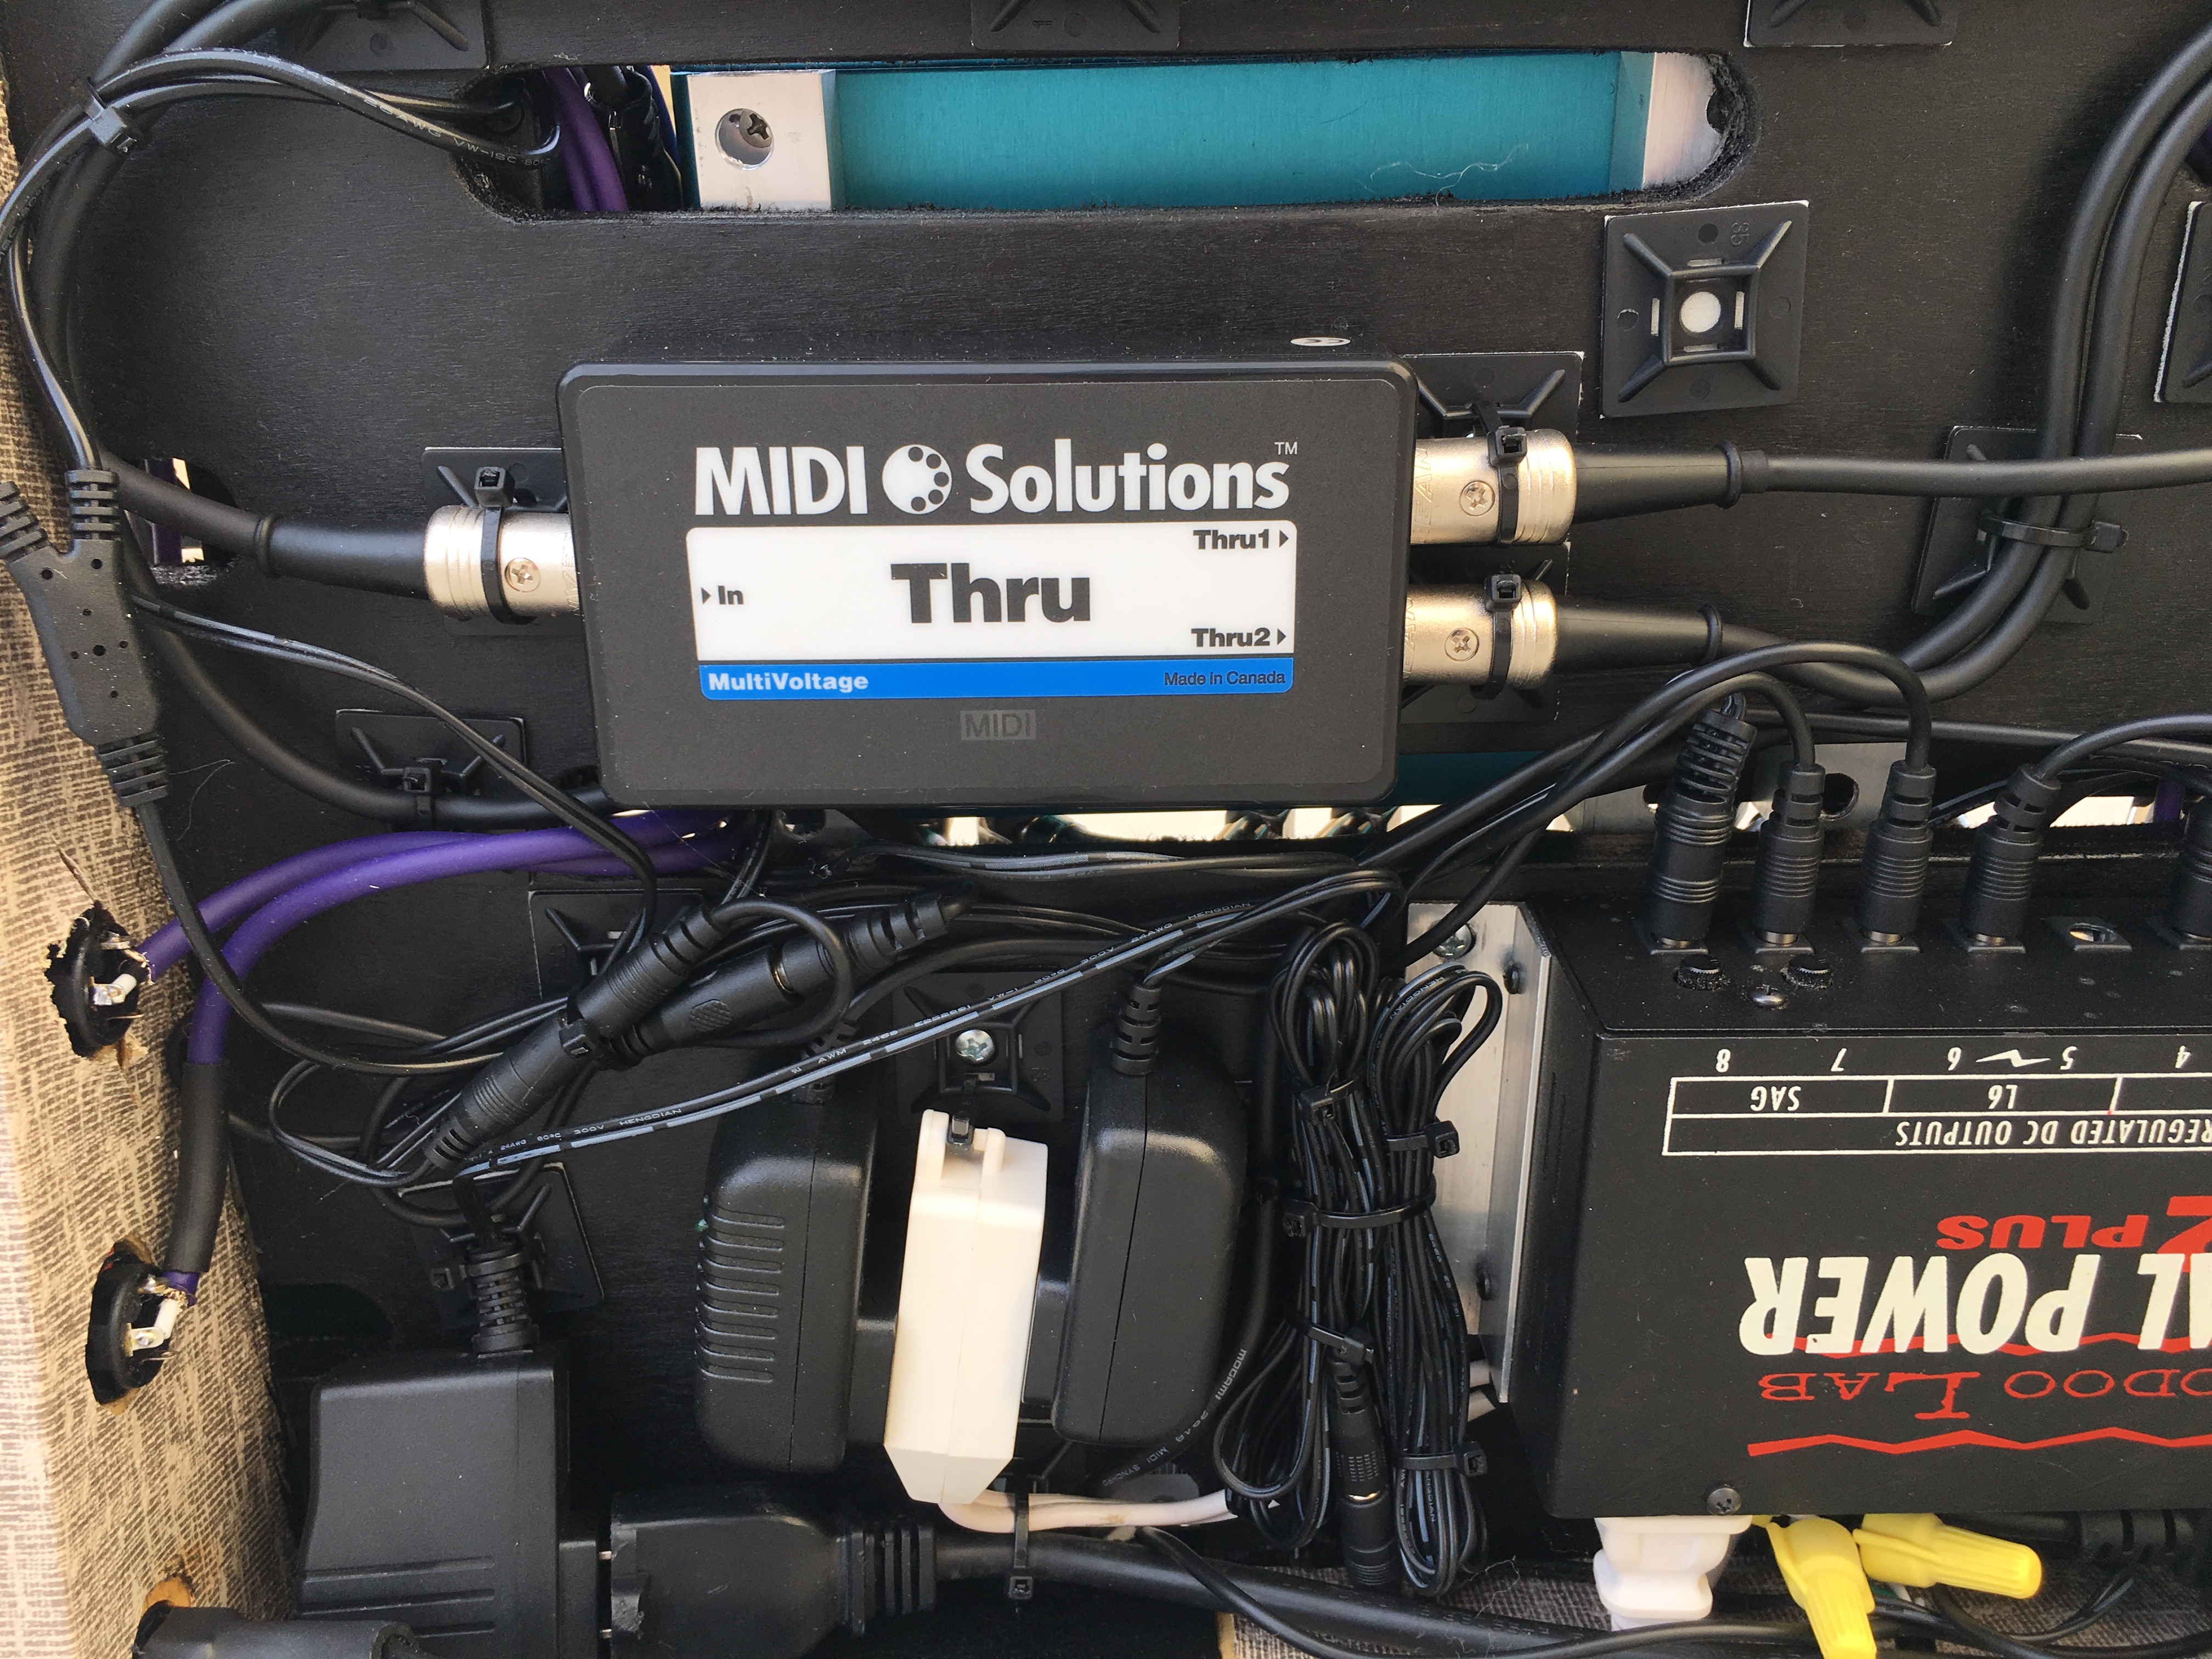
The second goal became especially problematic, so let me explain my solution. First of all, with a pedalboard that was crammed this tight together, there was no way I was going to be able to disconnect the MIDI plugs on my Strymons every time I wanted to use NIXIE (nor would I want to). So I had the idea of installing MIDI jacks on the side of my pedalboard that would always be connected when I wanted to use it. In order to use NIXIE with the Strymons, you need to connect both the MIDI in and out to a USB-MIDI adaptor but because the Two Notes Torpedo C.A.B. doesn’t have a MIDI out jack, I wouldn’t have been able to daisy chain all the pedals to form a complete loop. The other issue is that NIXIE doesn’t play nicely with the Eventide H9 in a MIDI loop because of the way the H9 handles MIDI through. To get around this, I used a “MIDI Solutions Thru” box that duplicates an incoming MIDI signal and sends it to two different places. As you can see from the graphic above, this allows me to complete a loop (indicated in red) with the Strymons while creating a separate line for the H9 and C.A.B.!!!
There are just a few simple steps to follow to get up and running with NIXIE in no time with this rig:
- Set the MIDI dip switch on the OC10 to “Thru”
- Set the BigSky to MIDI channel 2 (each Strymon pedal needs to be on a different MIDI channel for NIXIE to work if you’re daisy chaining more than one Strymon pedal)
- Connect the Roland UM-ONE to the MIDI jacks on the outside of the board (Strymon specifically recommends the UM-ONE)
- Connect the USB plug to your computer.
- Open NIXIE
Following this sequence, NIXIE will recognize all of my Strymon pedals and I’m be able to easily edit, save, store and load all my carefully curated presets!
ABLETON
My third goal (and frankly icing on the cake) was to get Ableton to fire my programs on the OC10 so that I could crowd surf before the solo section and have my programs automatically fire when the time came. To accomplish this, follow these steps:
- Practice soloing laying down on your back
- Practice soloing laying down on your back with your toddler trying to play with the tuning heads (because that’s what it’s gonna take if crowd surfing is your end goal)
- Set the MIDI dip switch on the OC10 to “Out” (what you should set it to normally when firing presets with your feet)
- Make sure all your MIDI pedals are set to MIDI channel 1.
- IMPORTANT: In order for the OC10 to be able to receive an incoming MIDI command from Ableton you must set “MIDI RX” to ON for each preset you want Ableton to be able to control. Since I also want the OC10 to send a command to my MIDI pedals, both the MIDI TX and MIDI RX must be set to ON. When done properly, you’ll see a red light by TX and a green light by RX. Click here for a pic.
- Connect the Roland UM-ONE to the MIDI jacks on the outside of the board (Strymon specifically recommends the UM-ONE)
- Connect the USB plug to your computer.
- (Alternatively, you can use the MIDI out from a USB recording interface instead, such as a Focusrite Scarlet 6i6)
- Open Ableton
- In Session view, insert a new MIDI track
- Under the “MIDI To” dropdown menu, select “UM-ONE.” Within that drop-down menu, you may need to select “Configure” if Ableton doesn’t automatically see your UM-ONE. In the preferences dialog that opens, turn the “Output” of the UM-ONE to “On” under the “Track” option. It should highlight in yellow once it’s on.
- Set the second drop-down option in the “MIDI To” section to “Ch. 1”
- In the top box of your MIDI channel strip, right click and “Insert MIDI Clip.”
- In the properties box that opens up below, change the “Quantization” to “None” and turn the “Loop” feature off.
- In the properties box, change the “Pgm” to the number you’d like. “Pgm 1” in Ableton fires Bank 1, PGM 1 on the OC10. “Pgm 2” in Ableton fires Bank 1, PGM 2 on the OC10, etc.
- For more info, check out the following videos (skip to 01:28 on the first one):
18,588 Comments